
Recently I have been doing a lot of DIY'S and upcyling and during my searches for how to do marbling effects and other styles I came across a video by the lovely Katherine Elizabeth (seriously check out her Youtube channel!) and she was doing DIY notebooks that were so unique and so stunning that I had to try it myself. I love marble pieces from homeware to stationary so to be able to use an effect that creates the same look in my favourite colours then I am going to use it to my full capability. It is actually a really useful technique but there are a few things I would do differently which I will explain later on until then... ENJOY!

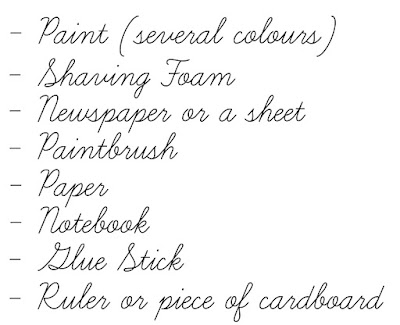
You will need:
Finished Product


Finished Product

For this piece it was kind of two step process working with the marbling effect and then working with the notebook. This was a really fun and messy technique to start of with as it involved using shaving foam and coloured paint. In the end I put shaving foam into a tray rather than on the bin bag layer I put down as it was easier to contain as I kept getting it on the floor haha oops! It was so much easier after each layer to clean out the tray and then refill with foam, however Katherine used food colouring in her video whereas I used normal paint. The problem with this was the fact that some of my paint when I mixed it around with a paintbrush sank to the bottom of the foam so it wasn't super strong with some pieces. Whereas Katherine's was super pigmented so I might have to retry it with food colouring, but I still loved my swirls and patterns because it did work.


I began the DIY by creating a surface of shaving foam and added in a few droplets of paint and mixed it around in swirls. I tried different combinations such as pink and purple, purple and turquoise and the colours on there own.


After creating a new colour combination I placed a piece of paper on top and pressed on it lightly. I removed the piece of paper once I saw the swirls showing through the paper knowing it had picked up enough colour. The piece of paper will have picked up the paint and also some foam so I then whipped off the foam with a piece of cardboard (I couldn't find my ruler cry cry cry!) which left me with a marbled effect on my paper. I really enjoyed doing this as there is a different outcome every time and it was fun playing around with colours.

The above image is just a few of the marbled effects I picked up some being very pigmented with different shades and most of the paper covered. Whereas the pieces with a light pigmentation and faint swirls was after new foam was applied, some of my favourites were definitely the ones with pink and purple as they blended together and the purple made a beautiful contrast.

Onto the steps after the marbled paper pieces have dried, I began to draw and cute out small triangles to create a geometric effect. I went for pink/purple toned paper contrasted against more purple/blue triangles. This was rather time consuming but it did look rather effective and I liked the way it looked after the first few rows.

So after a long time cutting out triangles and finally sticking them down I was left with a beautiful marbled geometric effect notebook which I love as it is completely unique to any other notebook. I hope to try larger triangles on another notebook to show more of the marble effect. I love DIYS as they are all about trial and error and now I know to use food colouring rather than paint and a ruler rather than cardboard. However it still came out effective and beautiful!


Another effect I tried out was using electrical tape to mark out some type of triangular pattern which I could paint into and then remove the tape leaving a crisp triangular pattern. It was a lot easier than the previous DIY but I just love the crispness of it and how pretty it looks.


Above is just a brief overview of the pattern I created and layed out from thick and thinner pieces of tape. I chose to mix pink and white to get light pink rather than the bright pink as I wasn't too sure it blended well with the copper paint and white.


So I began to paint the colours one at a time as I didn't want to have colours too close together. I loved having the tape purely because I could be as messy as i wanted and I knew once removing it it wouldn't have over ran or gone smudged. I had to do several coats of paint for the pink and white and the copper is rather heavy duty but the colours came out just as pigmented!

Once removing the tape the notebook looked just the way I hoped it to look. Sharp crisp triangles and the metallic copper really added something different to it.

Well that is all my lovelies hope you enjoyed these DIY's and let me know if you try it out!
All my love,

No comments:
Post a Comment